Installing Windows 11 on your laptop or PC can be a great way to take advantage of the latest features and functionality that Windows has to offer.
Table of Contents
ToggleWhy someone might want to install Windows 11 on their laptop or PC
There are several reasons why someone might want to install Windows 11 on their laptop or PC. Some of these reasons include:
Improved Performance
Windows 11 is designed to provide faster performance and improved efficiency compared to previous versions of Windows. This can result in faster boot times, smoother multitasking, and better overall performance.
Better User Experience
Windows 11 features a redesigned user interface with a modern look and feel. This includes a new Start menu, taskbar, and other visual changes that can enhance the user experience.
New Features
Windows 11 includes several new features, such as Snap Layouts, Snap Groups, and virtual desktops, that can improve productivity and make it easier to work with multiple windows.
Security Enhancements
Windows 11 includes several security enhancements, such as support for TPM 2.0 and Secure Boot, that can help protect your device and data from malware and other threats.
Compatibility with New Software
As software developers start to release new applications and games designed specifically for Windows 11, users who upgrade to Windows 11 will be able to take advantage of these new features and capabilities.
The minimum requirements for Windows 11
Lorem ipsum dolor sit amet, consectetur adipiscing elit. Ut elit tellus, luctus nec ullamcorper mattis, pulvinar dapibus leo.
- Processor: 1 gigahertz (GHz) or faster with 2 or more cores on a compatible 64-bit processor or System on a Chip (SoC)
- RAM: 4 gigabytes (GB) or more
- Storage: 64 GB or larger storage device (such as a hard drive or solid-state drive)
- System Firmware: UEFI, Secure Boot capable
- TPM: Trusted Platform Module (TPM) version 2.0
- Graphics Card: Compatible with DirectX 12 or later, with a WDDM 2.0 driver
- Display: High definition (720p) display that is greater than 9 inches diagonally, with 8 bits per color channel
- Internet connection: Internet connectivity is necessary to perform updates and to download and take advantage of some features.
It is important to note that these are the minimum requirements, and users may need to have higher specifications to get the best experience with Windows 11. Additionally, the PC Health Check app can be used to check compatibility and determine if a device meets the minimum requirements for Windows 11.
How to check compatibility using the PC Health Check app
Here are instructions for using the PC Health Check app to check compatibility for Windows 11:
First, download the PC Health Check app.
Once you have downloaded and installed the app, open it and click on the “Check now” button.
The app will then scan your system and display a message indicating whether or not your PC meets the minimum requirements for Windows 11.
If your PC meets the minimum requirements, the app will display a message that says “This PC can run Windows 11.” You can then proceed with the installation process.
If your PC does not meet the minimum requirements, the app will display a message that says “This PC cannot run Windows 11.” The app will also display a list of reasons why your PC is not compatible. You can then decide whether to upgrade your hardware or continue using your current operating system.
It’s important to note that the PC Health Check app is not always accurate, and some users have reported that it incorrectly reports their device as incompatible with Windows 11. In such cases, it may be necessary to use alternative methods to check compatibility or seek further guidance from Microsoft support.
How to create Bootable USB Drive
Here are the instructions for creating a bootable USB drive to install Windows 11:
First, download the Windows 11 ISO file from the Microsoft website.
Next, you will need to create a bootable USB drive. There are several tools that you can use to do this, but we will cover one options: Rufus Tool.
Using Rufus
Download and install Rufus on your computer.
Open Rufus and insert your USB drive into your computer.
In the “Device” dropdown menu, select your USB drive.
Under “Boot selection,” click the “Select” button and browse to the location where you saved the Windows 11 ISO file.
Leave all other settings at their default values and click the “Start” button.
Rufus will now format your USB drive and copy the Windows 11 ISO file to the drive, making it bootable.
How to boot from usb windows 11
here are instructions for setting the USB drive as the boot device:
First, turn off your laptop or PC and connect the bootable USB drive that you created in the previous step.
Turn on your laptop or PC and immediately start tapping the key or key combination that is required to access the BIOS or UEFI settings. The exact key or key combination varies depending on the manufacturer and model of your laptop or PC, but some common keys to try include:
- F2
- F12
- Esc
- Delete
- Enter
If you are unsure which key to press, you can try searching for the key combination online or consulting the documentation that came with your laptop or PC.
Once you have accessed the BIOS or UEFI settings, use the arrow keys to navigate to the “Boot” or “Boot Options” menu.
In the “Boot” or “Boot Options” menu, use the arrow keys to select the option to change the boot order or boot device priority.
Use the arrow keys to move the USB drive to the top of the boot order or boot device priority list.
Save your changes and exit the BIOS or UEFI settings.
Your laptop or PC will now boot from the USB drive and start the Windows 11 installation process.
It’s important to note that the exact steps for setting the USB drive as the boot device may vary depending on your laptop or PC, and you may need to consult the documentation or contact the manufacturer for further guidance if you are having difficulty.
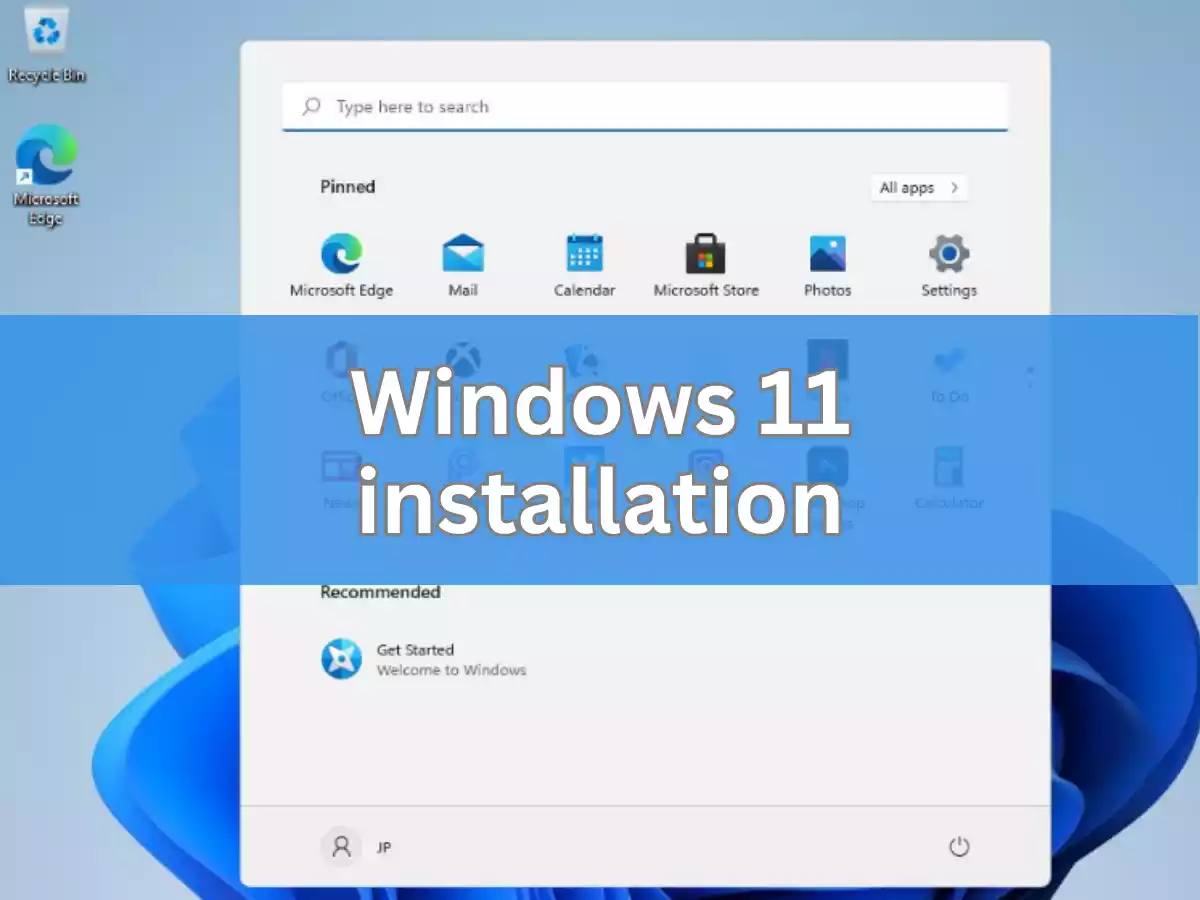
Step-by-step instructions for installing Windows 11
here are step-by-step instructions for installing Windows 11:
First, insert the bootable USB drive into your laptop or PC and set it as the boot device following the instructions in the previous section.

Once the laptop or PC has booted from the USB drive, you will see the Press any key to boot from CD or DVD screen.
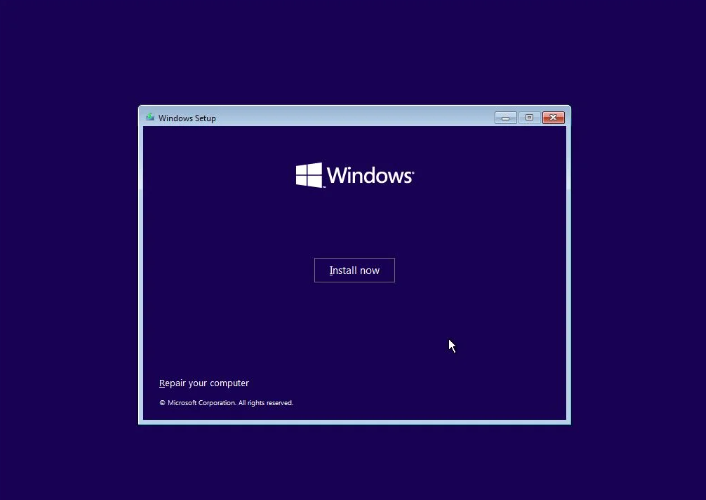
Click the “Install now” button to begin the installation process.
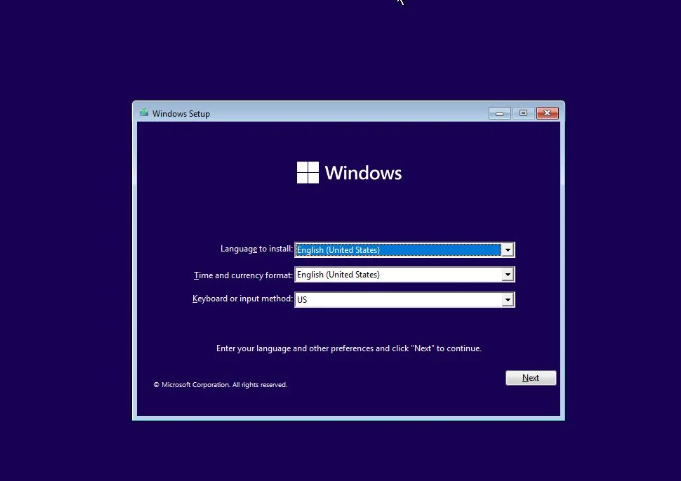
Select your language, time and currency format, and keyboard or input method, and click “Next”.
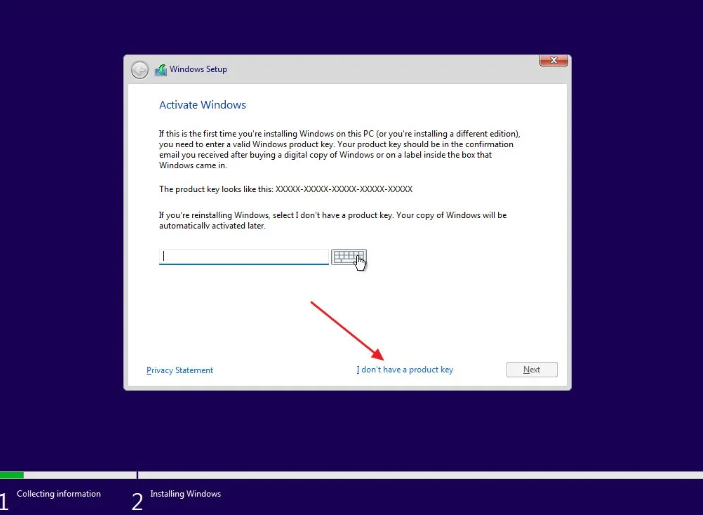
Enter your product key if prompted or click “I don’t have a product key” if you don’t have one.
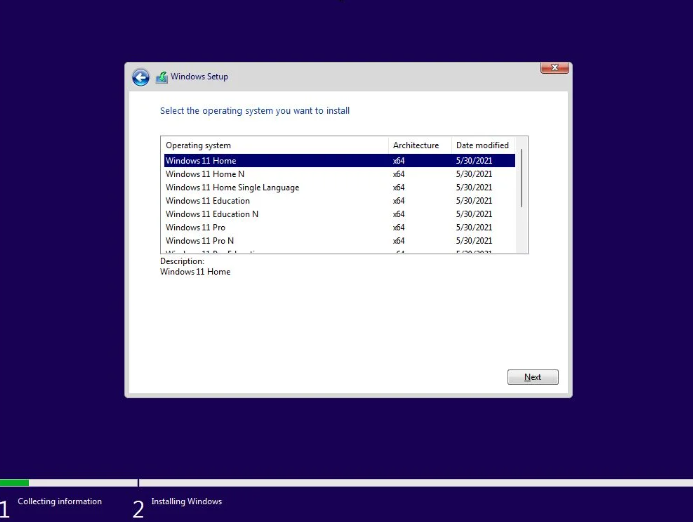
Select the windows 11 version and click “Next”
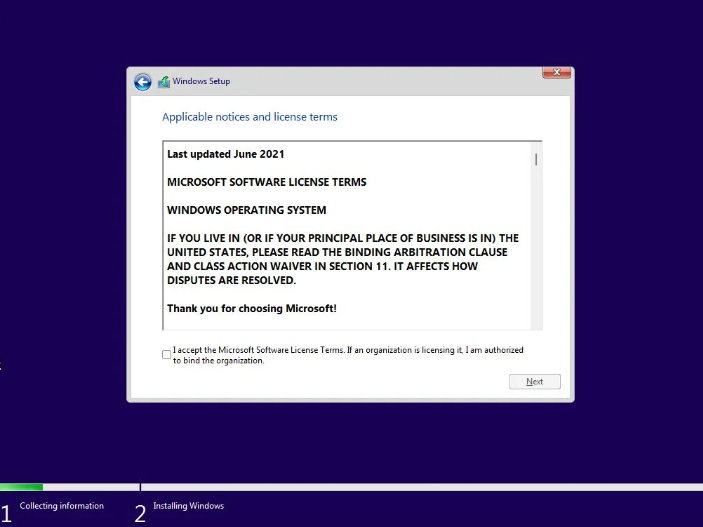
Accept the license terms by selecting the appropriate option and clicking “Next.”
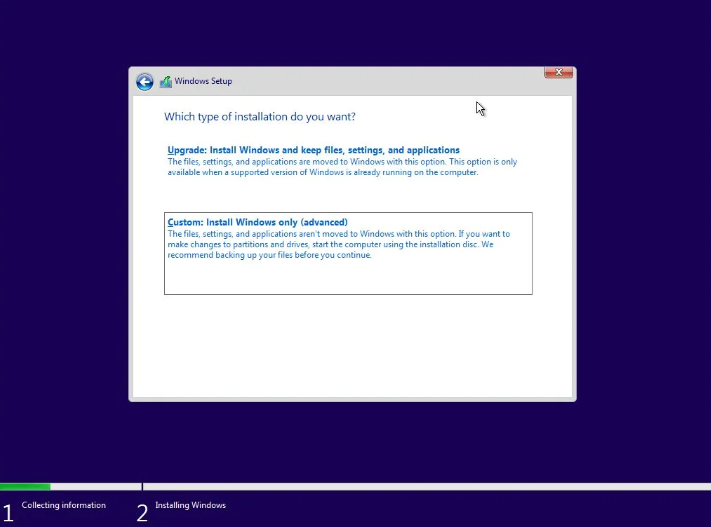
Choose the type of installation you want to perform: “Upgrade” or “Custom.”
If you choose “Upgrade,” Windows 10 will attempt to upgrade your existing operating system to Windows 10. If you choose “Custom,” you can select which partition to install Windows 10 on and perform a clean installation.
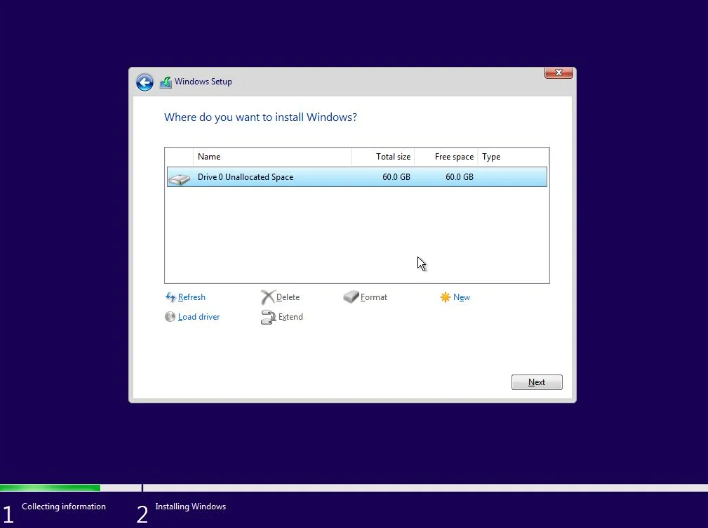
- Select the partition where you want to install Windows 11 and click “Next.”
- To create a new partition, select the unallocated space on the drive and click on “New”. Enter the size of the partition you want to create and click on “Apply”.
- Select Partition to Install Windows Select the partition you just created and click on “Next” to continue with the installation.
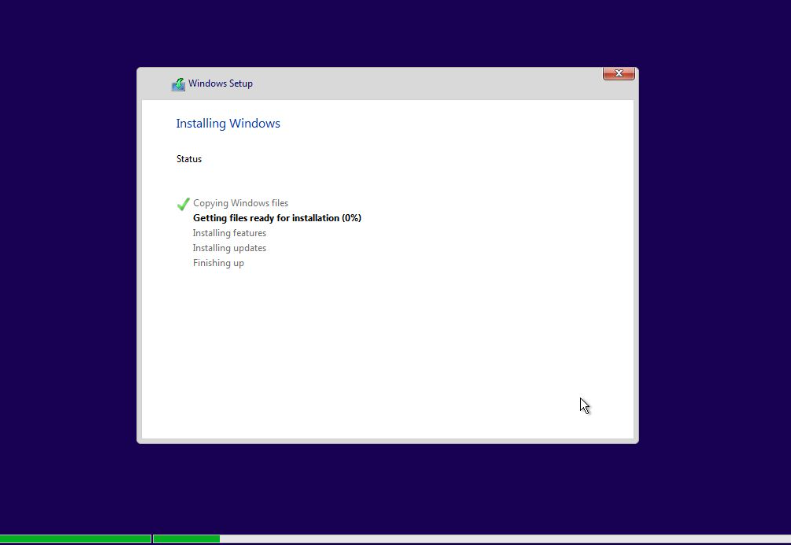
Windows 11 will now begin installing on your selected hard drive or partition. This process may take several minutes to complete.
- On the “Hi there” screen, select your region, and click “Yes”.
- On the “What’s the name of this PC?” screen, enter a name for your laptop or PC, and click “Next”.
- On the “Help protect your device” screen, you can choose to either set up a PIN or password for your device or choose “Skip for now”.
- On the “Get even more out of Windows” screen, you can choose to either customize your settings or choose “Use recommended settings”. We recommend choosing the “Use recommended settings” option.
- On the “Sign in with Microsoft” screen, you can either sign in with a Microsoft account or create a local account. If you choose to sign in with a Microsoft account, you will be prompted to enter your email address and password.
Follow the on-screen instructions to complete the setup process, and then wait for Windows 11 to configure your settings.
Once the setup process is complete, you will see the Windows 11 desktop. Congratulations, you have successfully installed Windows 11 on your laptop or PC!
It’s important to note that the exact steps may vary slightly depending on your laptop or PC, but these instructions should give you a general idea of the installation process.
Post-Installation Steps
You will see the Windows 11 desktop: Once you sign in, you will see the Windows 11 desktop. This is where you can access all of your files, programs, and settings.
You can install applications and drivers: After Windows 11 is installed, you can begin installing applications and drivers. You can download and install applications from the Microsoft Store or from other sources.
You can customize your settings: Windows 11 offers many customization options, including themes, wallpapers, and color schemes. You can customize these settings to suit your preferences.
You can begin using your laptop or PC: Once Windows 11 is installed, you can begin using your laptop or PC. You can browse the web, use productivity applications, play games, and more.
It’s important to note that the exact steps and options may vary depending on your laptop or PC. However, in general, these are the things that happen after Windows 11 is installed.
How to install drivers and applications as needed
After installing Windows 11 on your laptop or PC, you may need to install drivers and applications to ensure that all of your hardware and software functions properly. Here’s how to install drivers and applications as needed:
Installing drivers:
Go to your laptop or PC manufacturer’s website and look for the driver downloads section.
Enter your laptop or PC model number to find the appropriate drivers for your system.
Download and install the drivers for your hardware, such as the graphics card, sound card, network card, and other devices.
Follow the prompts to install the drivers and restart your system if necessary.
Installing applications:
Go to the Microsoft Store or other software download website to find the applications you want to install.
Download the applications and follow the prompts to install them on your system.
If the application requires a license key or activation, enter the information as prompted.
Once the installation is complete, you can launch the application and start using it.
It’s important to note that some applications may require specific hardware or software configurations, and some drivers may only be available from the laptop or PC manufacturer. If you are unsure about which drivers or applications to install, consult the manufacturer’s documentation or customer support for assistance.
In addition, you should keep your drivers and applications up-to-date to ensure that your laptop or PC runs smoothly and securely. You can check for updates in the Microsoft Store or by going to the manufacturer’s website and downloading the latest versions.
Solutions to common issues that may arise during the installation process
Here are some common issues that may arise during the installation process of Windows 11, along with some possible solutions:
Error messages during installation:
If you receive an error message during the installation process, try restarting your computer and starting the installation process again.
If the error message persists, check your system requirements and ensure that your hardware meets the minimum requirements for Windows 11.
You can also try disabling any antivirus software or third-party security software during the installation process, as these programs can sometimes interfere with the installation process.
Boot issues:
If your laptop or PC does not boot from the USB drive, make sure that the USB drive is set as the boot device in your system BIOS.
If your laptop or PC is still not booting from the USB drive, try using a different USB port or a different USB drive.
You can also try resetting your BIOS settings to default and then try again.
Driver issues:
If you experience issues with hardware devices after installing Windows 11, check the manufacturer’s website for updated drivers and install them as needed.
If you are unable to find updated drivers, try uninstalling the device and then restarting your laptop or PC. Windows will automatically try to reinstall the device and install the appropriate drivers.
Conclusion
Installing Windows 11 on your laptop or PC can be a great way to take advantage of the latest features and functionality that Windows has to offer. However, it’s important to ensure that your system meets the minimum requirements for Windows 11 before proceeding with the installation process. By using the PC Health Check app to check compatibility, creating a bootable USB drive, and following the steps outlined in this guide, you can successfully install Windows 11 on your laptop or PC. Additionally, by keeping your drivers and applications up-to-date and troubleshooting any issues that may arise during the installation process, you can ensure that your system runs smoothly and securely with Windows 11.